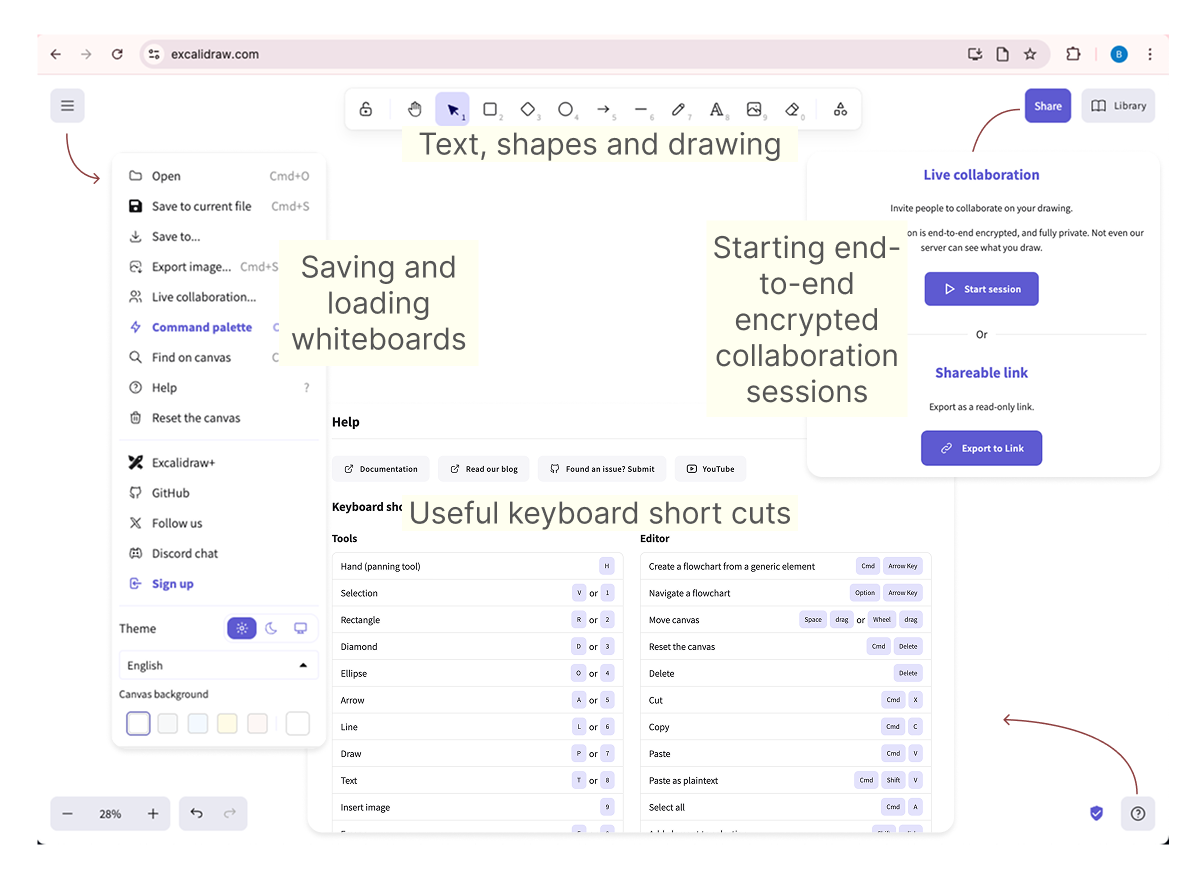
Using the Excalidraw whiteboard
Use the Excalidraw whiteboard to organize information for developing depositional conceptual models. You can add text boxes, insert images, and create sketches using the available tools.

Excalidraw is an extremely easy-to-use digital whiteboard that runs directly in your browser.
You can save your whiteboards locally and reload them later as needed. Your data remains entirely in your browser and never leaves your device.
Excalidraw also allows sharing your whiteboard via links. Avoid this option when the whiteboard contains images, as there are size limitations. When used, the feature provides end-to-end encryption by encrypting your data and drawings locally in the browser, ensuring the server never has access to decrypted content.
Practical use guide
- Click on the Resources tab and select the Open Excalidraw whiteboard option. The whiteboard will open in a new tab.
- Explore the whiteboard interface:
-
Use the top menu bar to add objects and information to the whiteboard.
-
Click the hamburger icon in the top-left corner to open the left menu. This menu allows you to save or load whiteboards and reset the canvas if you want to start over.
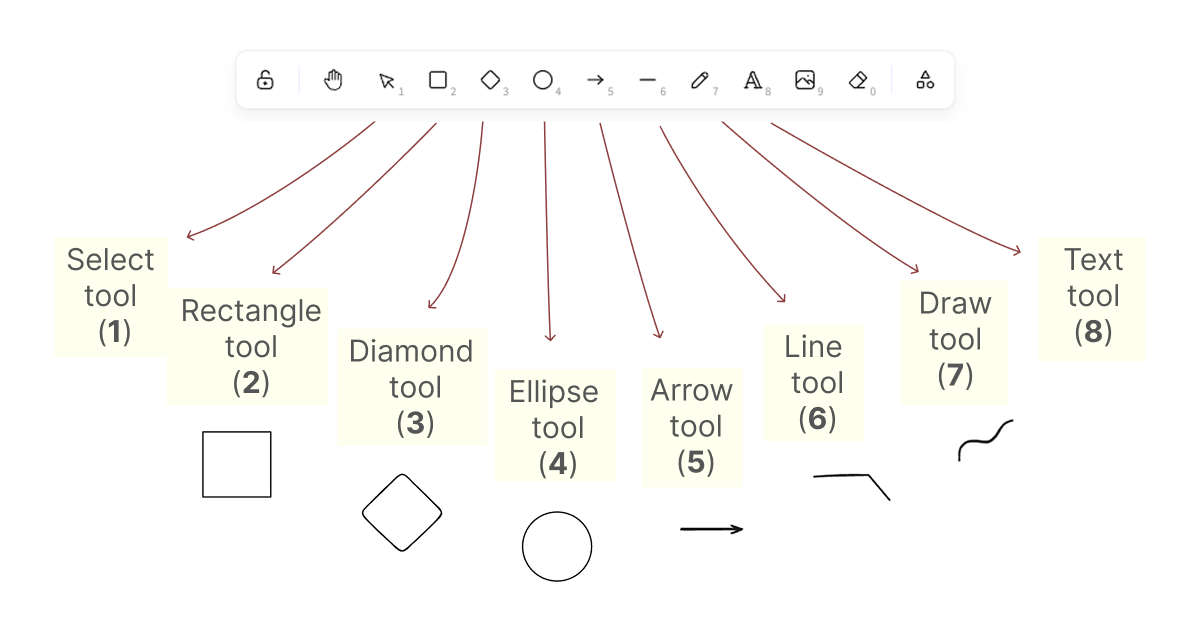
Adding objects to the whiteboard
-
Use the top menu to select the type of object you want to add to the whiteboard.
-
Use the number keys on your keyboard as shortcuts (e.g., 1 – Selection Tool, 2 – Rectangle, 8 – Textbox).
You can add images by using the Insert Image button (9) or by simply copying and pasting the image on the whiteboard. The latter option is very convenient when inserting Sedbase screen grabs.
-
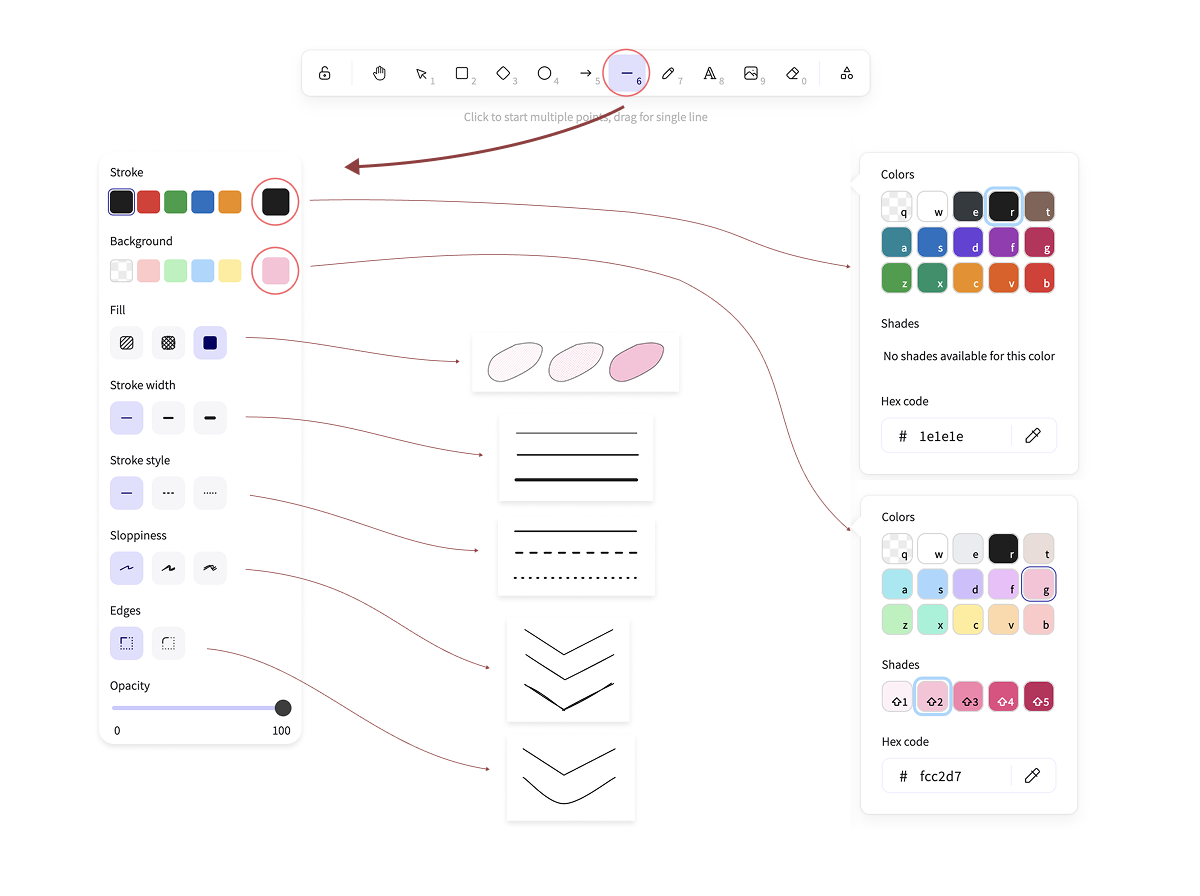
When you add a new object, a menu will appear on the left—use it to adjust the object’s properties.
Sketching conceptual models
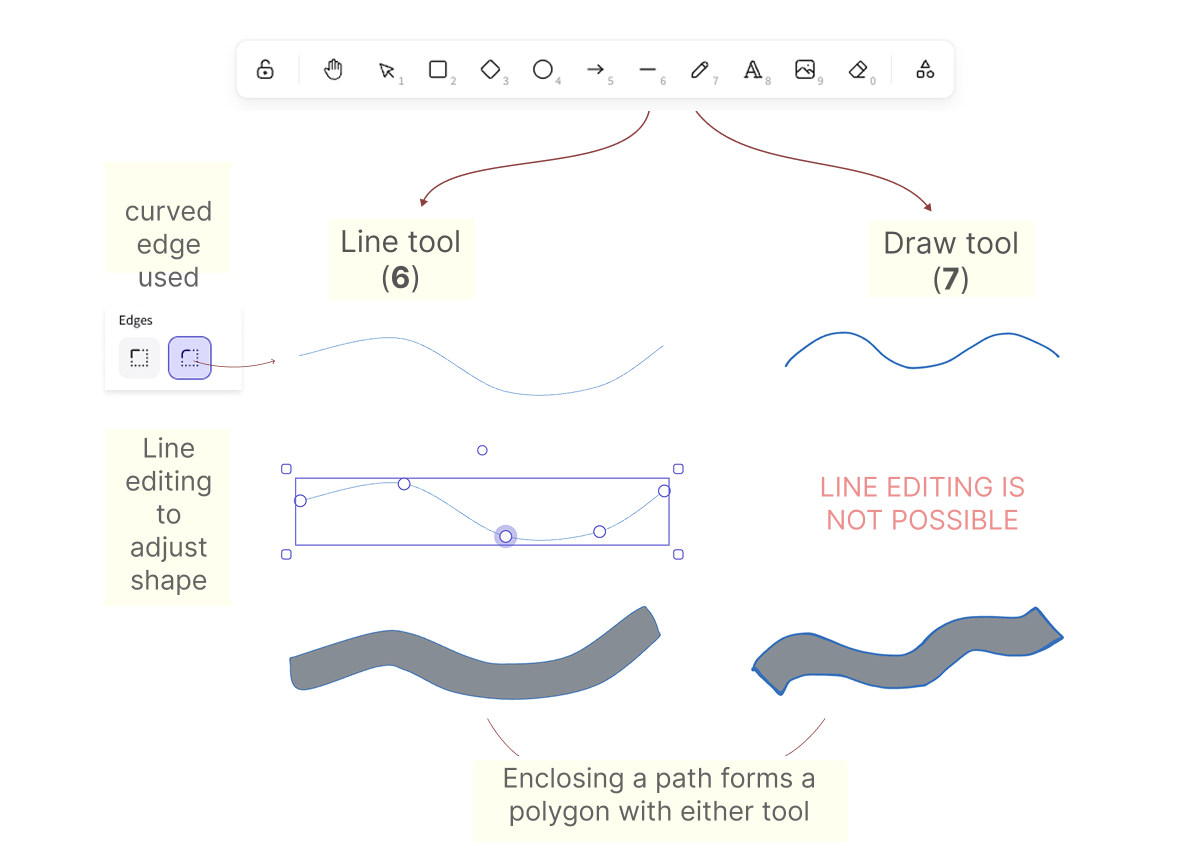
Use the Line tool (6) or the Draw tool (7) in the top menu to easily draw vector or freehand curves directly on your whiteboard.
-
You can adjust the stroke’s color and opacity.
-
Closing a curve creates a polygon that can be filled with a background color.
Saving and loading your data using local files
Open the left menu by clicking the hamburger icon in the top left of the whiteboard
-
Click on the Save to and use the Save to disk option in the pop-up window that opens. Select your file name.
-
Click on the Open option and choose Load from file in the pop-up window that opens.
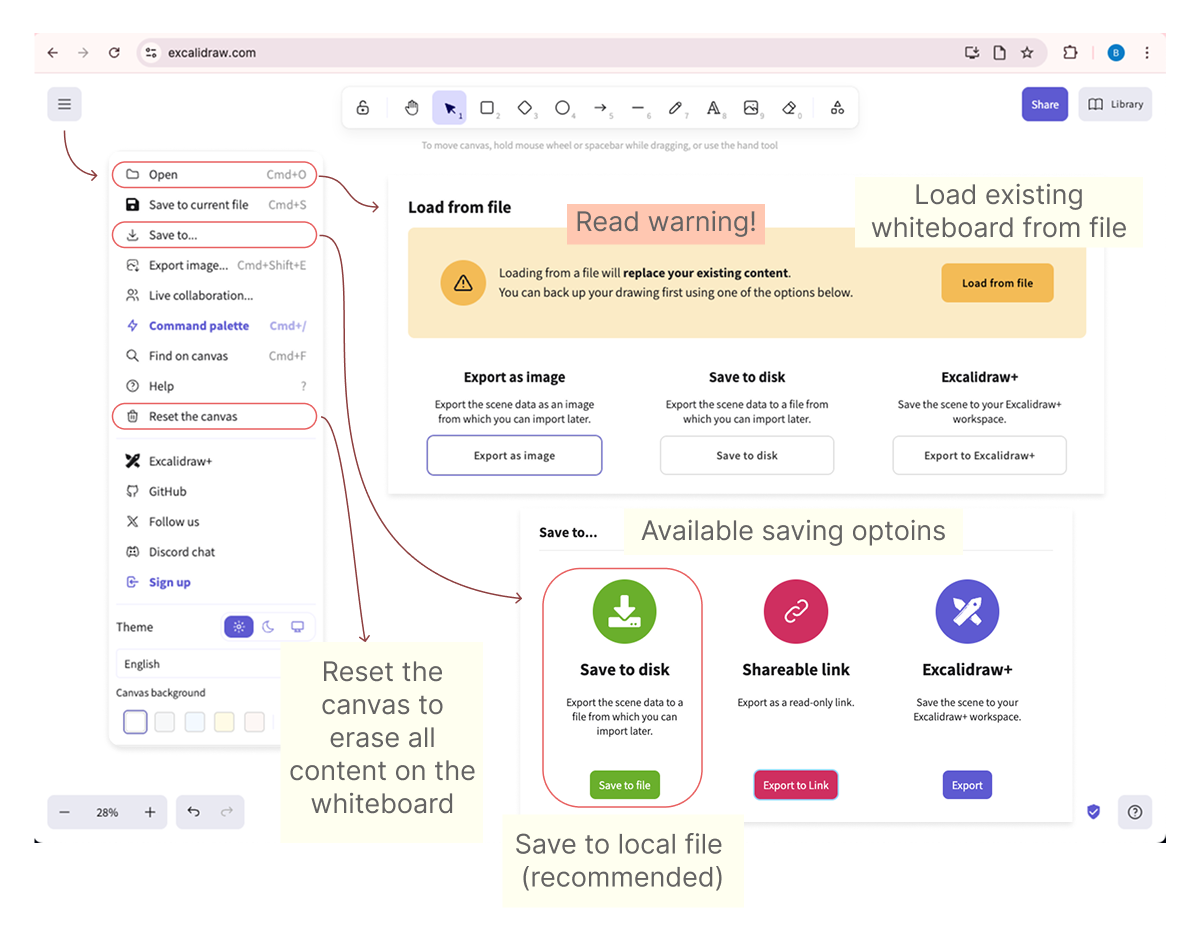
If you're having trouble loading a previously saved file on an existing whiteboard, try using the Reset the canvas option first—then attempt to load the file again. The Reset the canvas option is also available in the left menu.
Exporting images
You can export whiteboard content as .png images in two ways
- Copy to Clipboard as PNG: Select the objects you want to export, right-click the selection, and choose Copy to clipboard as PNG. Note that this method does not allow you to adjust image resolution.
- Export Image via Menu: Select the objects, click the hamburger icon in the top-left corner, and choose Export image.... Use the Scale option to control the resolution of the exported image.